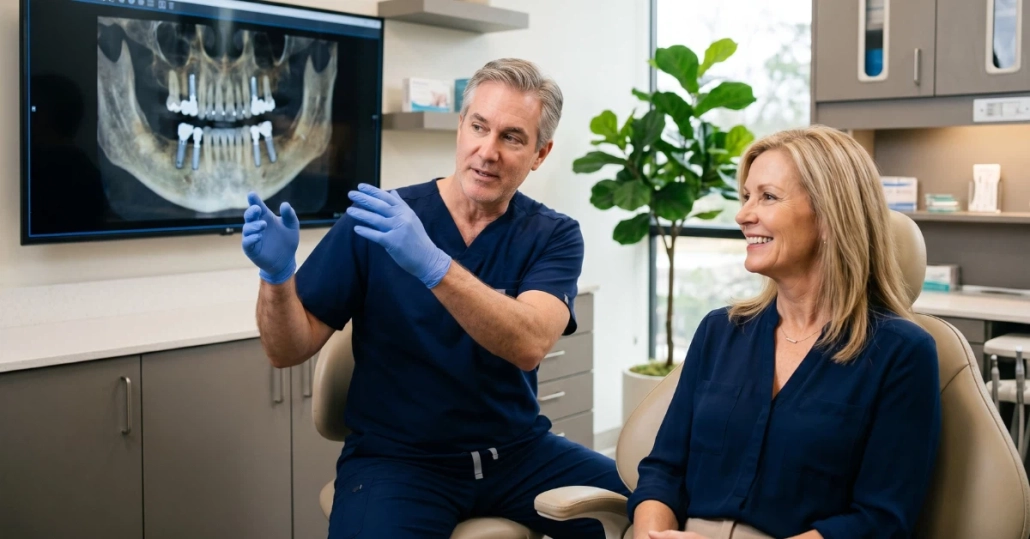
Your dentures slip when you laugh. They click when you talk. You’ve given up on corn on the cob entirely. Your dentist just mentioned something called implant-supported dentures, often referred to as snap-in dentures, also known as snap-on dentures – dentures that snap onto implants and actually stay put – but you’re not entirely sure how they differ from the regular dentures causing you so much frustration, or whether the added cost makes sense.
I’ve helped hundreds of patients throughout Austin, Round Rock, and the surrounding areas transition from traditional dentures to implant-supported dentures, and the difference in their daily confidence is remarkable. They’re not constantly worried about their teeth shifting during conversations. They eat foods they haven’t enjoyed in years. But the decision to upgrade involves understanding exactly how snap-in dentures work, what maintenance snap-in denture systems require, and whether the investment delivers value for your specific situation.
Here’s what you need to know about snap-in dentures – also called snap on dentures, implant-retained dentures, or overdentures – how the snap-in attachment system functions, the different options available, realistic maintenance requirements, and the costs involved. We’ll break down each component so you understand exactly what you’re getting and can make an informed decision about whether this solution fits your needs.
✔ Key Takeaways
- Snap-in dentures anchor to 2–4 dental implants surgically placed in your jaw — eliminating the slipping, clicking, and adhesive of traditional dentures
- Three main attachment systems are available: ball-and-socket, locator, and bar-retained — each with different stability, maintenance, and cost profiles
- Lower arch treatment starts around $6,000–$12,000; upper arch $12,000–$20,000 — with a total 10-year cost difference of roughly $2,200 over traditional dentures
- The implants themselves have a documented 96.4% 10-year survival rate — the denture portion is replaced every 5–8 years
- Treatment takes 4–7 months from consultation to final result, with 3–6 months for osseointegration
- Snap-in dentures are removable — they are not the same as permanently fixed All-on-4 implants
Survival Rate
Before Replacement
Per Arch
How Snap-On Dental Implants and Snap-In Dentures Actually Work
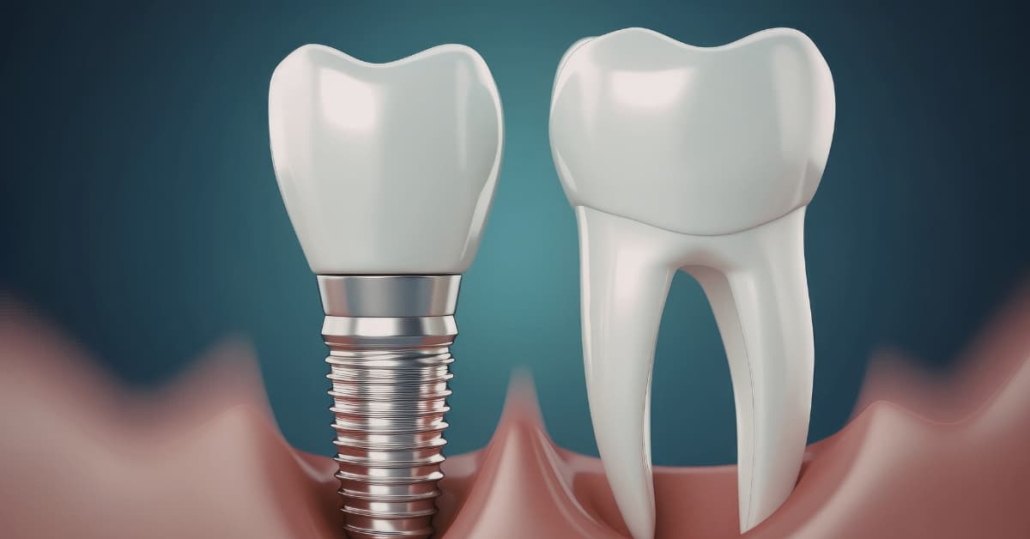
Traditional dentures rest on your gums and stay in place through suction, gravity, and sometimes adhesive. Implant-supported dentures – commonly called snap-in dentures or snap-on dentures – use a fundamentally different approach. They snap onto dental implants surgically placed in your jaw bone. Because snap-in dentures anchor to implants rather than resting solely on gum tissue, they provide a level of stability that traditional removable dentures cannot achieve. This changes everything about the comfort and function of your dentures.
The Basic Components
Think of snap-in dentures as having three main parts working together. First, you have the dental implants themselves – typically two to four titanium posts placed into your jaw bone. These act as anchors, similar to fence posts set in concrete. The implants integrate with your bone over several months through osseointegration, creating stable foundations that won’t move.
Second, you have attachment components that connect to these implants. The most common system uses ball-and-socket attachments, though there are other designs we’ll cover shortly. The “male” part attaches to the implant and sits above your gum line. The “female” part embeds in your denture base.
Third, you have the denture itself – a removable prosthetic that looks similar to traditional dentures but includes special housing for the attachment components. You position the denture over the attachments and press down. The components snap together, locking the denture onto the implants. You can still remove the denture for cleaning, but it stays firmly in place during normal use.
The Snap-In Mechanism Explained
The defining feature of snap-in dentures is the mechanical attachment system that locks the denture securely onto dental implants while still allowing easy removal for cleaning. This snap-in design is what separates snap-in dentures from conventional dentures that rely on suction or adhesive alone.
The ball-and-socket system works exactly like it sounds. Each implant receives a ball-shaped attachment that protrudes slightly above the gum tissue. Your denture has corresponding sockets – small metal housings with rubber O-rings inside – built into the base in positions that align with the implant locations. When you insert the denture, the ball attachments fit into the sockets. The rubber O-rings grip the balls tightly, creating the “snap” you feel and hear when the denture seats properly. This grip holds the denture securely against your gums. To remove the denture, you apply upward pressure that overcomes the O-ring grip, releasing the snap connection.
The system provides substantial stability improvement over traditional dentures while maintaining the removable convenience many patients prefer. You take the denture out at night for cleaning, then snap it back in the morning. No adhesive required. No worry about it coming loose during meals or conversations.
How Many Implants Do You Actually Need?
This depends on which arch you’re treating and the specific system design. For lower arch snap-in dentures, two dental implants typically provide adequate stability for most patients. The lower jaw generally has denser bone, and two well-placed implants create enough anchorage to dramatically improve denture retention.
Upper arch implant-supported dentures usually require four implants for optimal stability. The upper jaw has softer bone, and the denture covers more area – you need additional anchor points for reliable retention. Some systems use three implants on the upper arch, but four provides better long-term stability for most patients. If you are missing all your upper or lower teeth, snap-in overdentures are one of the most cost-effective paths to a stable, functional smile.
More implants generally mean better stability and retention. A lower denture on four implants will feel more secure than one on two implants. But there’s a point of diminishing returns – going from two to four implants on the lower arch provides noticeable improvement, but going from four to six offers minimal additional benefit for most patients while significantly increasing cost.
Different Attachment Systems for Snap-In Dentures
Several attachment designs exist for snap-in dentures, and each affects stability, maintenance, and long-term cost. Choosing the right attachment system plays a major role in how snap-in dentures feel, function, and wear over time. Understanding the differences helps you make informed decisions about which system suits your needs.
Ball-and-Socket Attachments
This is the most common system for implant-supported dentures. Ball attachments screw onto the implants and project above the gum line. The denture contains metal housings with rubber O-rings that grip these balls when you insert the denture.
Ball-and-socket systems offer several advantages. They’re relatively simple in design, which makes them easier to maintain and repair. The components are widely available and reasonably affordable. Most dentists have extensive experience working with ball attachments, so finding care is straightforward.
The O-rings wear out over time – typically needing replacement every 12 to 18 months. This is normal maintenance, not a failure of the system. As the O-rings wear, you’ll notice the denture feels slightly looser. Replacing the O-rings restores the original tight snap and takes just a few minutes during a regular dental appointment.
Ball attachments allow some rotational movement of the denture. This can be beneficial – it lets the denture adapt to your jaw contours during chewing. But some patients prefer systems with less movement, which brings us to the next option.
Locator Attachments
Locator systems use a different design that provides lower profile and potentially better retention. Instead of a ball, the implant receives a flat abutment with specific geometry. The denture contains replaceable nylon inserts that lock onto this abutment when you seat the denture.
Locator attachments sit closer to the tissue than ball attachments, which some patients find more comfortable. They also provide self-aligning insertion – the denture automatically finds the correct position as you press down, which makes insertion easier, especially for patients with limited dexterity.
The nylon inserts come in different retention strengths, color-coded for easy identification. Your dentist can adjust retention by changing insert strength – useful as your needs evolve or if you prefer tighter or looser retention. Like O-rings, these inserts wear over time and need periodic replacement.
Locator systems typically cost slightly more than ball attachments initially, but many patients find the lower profile and self-aligning feature worth the additional investment. The maintenance requirements are similar – replace worn inserts every 12 to 24 months depending on use.
Bar-Retained Attachments
Bar-retained systems connect multiple implants with a metal bar that runs along your gum line. The denture has clips or attachments that snap onto this bar. This design distributes forces across all implants more evenly than individual ball or locator attachments.
Bar systems require at least three implants to create stable attachment points for the bar. The bar gets custom-fabricated to fit your specific implant positions and jaw contours. This customization provides excellent stability and retention but increases both complexity and cost.
Cleaning around the bar requires extra effort – you need to thoroughly clean under and around it daily to prevent tissue irritation and maintain hygiene. Some patients find this maintenance burden challenging. Others appreciate the exceptional stability the bar provides and consider the extra cleaning time worthwhile.
Bar-retained dentures typically cost $2,000 to $5,000 more than ball or locator systems due to the custom bar fabrication. They’re often recommended for patients who need maximum stability or have specific jaw anatomy that benefits from the bar design.
Comparing System Options
- Ball-and-socket – Most affordable, widely available, simple maintenance, allows some rotational movement, O-rings need replacement every 12-18 months
- Locator – Lower profile, self-aligning, adjustable retention, slightly higher cost, inserts need replacement every 12-24 months
- Bar-retained – Maximum stability, distributes forces evenly, requires more cleaning, highest cost, clips need occasional replacement
- Stabili-teeth® – A proprietary implant system available at Optima Dental that combines the security of implant-anchored retention with a treatment process designed for speed and predictability. Ask about this option during your consultation if you want an alternative to traditional snap-in attachment designs.
Explore Each Attachment System Side by Side
Tap a system to see cost, maintenance intervals, and who it's best for at a glance
Ball-and-Socket System
The most widely used snap-in attachment worldwide
A ball-shaped abutment on each implant snaps into a rubber O-ring housing in the denture base. The mechanical snap is firm and reliable. Most dentists are trained to maintain it, making repairs and replacements straightforward wherever you live.
Best for
First-time implant denture patients, budget-conscious cases, and patients who need predictable, easy-to-service care anywhere in the country.
Locator System
Self-aligning design with adjustable retention strength
A flat, keyed abutment mates with a color-coded nylon insert in the denture. The denture self-aligns as you seat it — particularly helpful for patients with arthritis or limited dexterity. Retention strength is tunable by swapping insert colors.
Best for
Patients with limited hand dexterity, those who prefer lower-profile hardware, or anyone who wants the ability to fine-tune retention strength over time.
Bar-Retained System
Maximum stability through custom-fabricated multi-implant support
A custom-milled metal bar bridges all implants and runs along your gum line. The denture snaps onto bar clips rather than individual abutments, distributing chewing forces across every post simultaneously. The result is exceptional stability — at the cost of extra daily cleaning beneath the bar.
Best for
Patients needing maximum retention, those with heavier bite forces, or cases where individual attachment points don't provide sufficient stability on their own.
Snap-In Dentures Pros and Cons
Every patient considering snap-on dentures asks the same question before committing to treatment: “What am I actually gaining, and what am I giving up?” After working with hundreds of patients who’ve made this transition, here’s an honest breakdown of what implant-retained dentures deliver – and where they fall short.
Pros of Snap-In Dentures (Implant-Supported Overdentures)
- No more slipping, clicking, or adhesive – The snap-fit mechanism holds your denture firmly against your gums, eliminating the embarrassing movement that plagues traditional dentures during meals and conversations.
- Improved chewing ability – Because snap-on dentures anchor to implants, you regain the ability to eat foods you’ve long avoided – apples, steak, corn, and other firm foods that denture wearers typically give up.
- Jawbone preservation – Dental implants stimulate the jaw bone the way natural tooth roots do, slowing the bone resorption that occurs with traditional dentures. Research published in the Journal of Dentistry confirms that dental implants demonstrate a 10-year survival rate of approximately 96.4%, supporting their role as long-term bone preservation anchors. Without implants, bone loss continues and changes your facial appearance over time.
- Natural appearance – Modern snap-in dentures are custom-fabricated to match your facial features, gum coloring, and desired tooth shape and shade. Most people cannot tell the difference from natural teeth.
- Removable for easy cleaning – Unlike All-on-4 dental implants, snap-in overdentures come out for daily cleaning, making hygiene straightforward and accessible.
- Fewer implants than permanent full-arch solutions – Snap-on dentures typically require only 2 implants for the lower arch and 4 for the upper arch, compared to 4-8 implants for fixed full-arch implants. This means lower surgical complexity and cost.
- Long-term durability – The implants supporting your snap-in denture can last a lifetime with proper care. You’re replacing the denture portion every 5-8 years, not the implant infrastructure.
Cons of Snap-In Dentures
- Higher upfront cost than traditional dentures – Snap in dentures cost $6,000 to $20,000 depending on arch and system, compared to $1,500 to $4,000 for conventional dentures.
- Requires surgery – Implant placement is a surgical procedure done under local anesthesia, with a recovery period of several days to a week for the surgical sites.
- 3 to 6 month healing period – You cannot receive the final snap-in attachments until the implants fully integrate with the jaw bone, which requires patience.
- O-ring and attachment maintenance – Every 12 to 24 months, your O-rings or nylon inserts will need replacement at approximately $100 to $300 per visit.
- May require bone grafting – If significant bone loss has already occurred, bone grafting for implants may be necessary before implant placement, adding time and cost to treatment. We can assess this with 3D imaging at your consultation in Austin or Round Rock.
- Still removable, not permanently fixed – If your goal is teeth that never come out, snap-in implant dentures are not the same as fully fixed All-on-4 implants. You will still remove them for cleaning.
- Daily cleaning routine required – Implant-supported dentures demand consistent hygiene. Inadequate cleaning can lead to tissue irritation around the implant sites.
For most patients weighing these factors, the stability gains outweigh the additional cost and commitment – particularly for lower denture wearers who have struggled with retention for years. If you’re unsure which side of the ledger tips in your favor, a consultation with Dr. Kris Owens or Dr. Faiza Ali will give you a clear, personalized picture.
The Treatment Process Step by Step
Understanding what actually happens from consultation to final denture helps you prepare mentally, logistically, and financially for implant-supported dentures. The timeline stretches over several months typically, with distinct phases.
Treatment Road Map
Phase 1 – Consultation and Planning
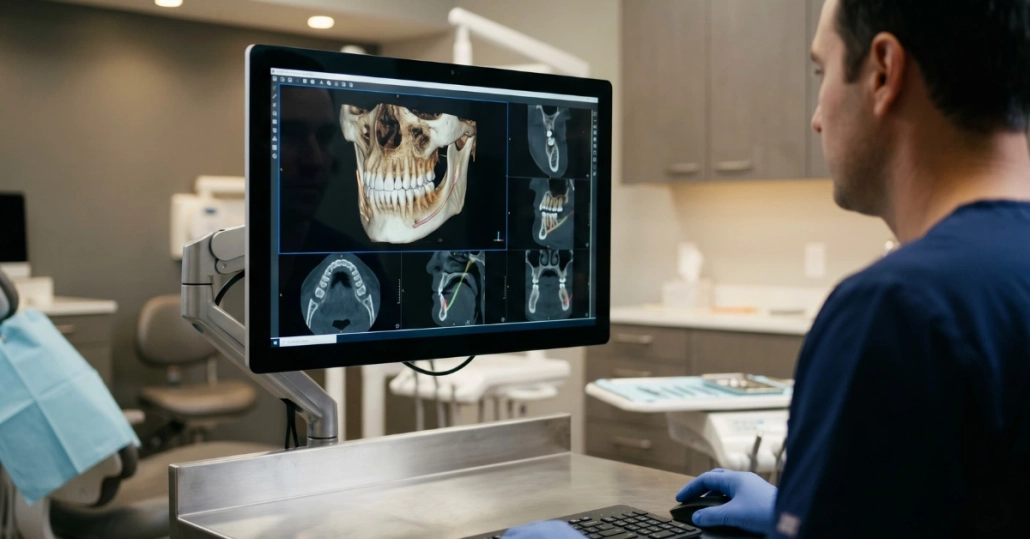
Your initial consultation at our Austin or Round Rock location includes a full examination and imaging. Dr. Faiza Ali and Dr. Kris Owens evaluate your jaw bone using X-rays or CT scans to determine bone quality and quantity. Adequate bone volume is essential – the implants need sufficient bone for stable placement and integration.
If you currently wear dentures, the dentist assesses their condition. Sometimes your existing dentures can be modified to work with the new implants, saving significant cost. Other times, new dentures are recommended alongside implant placement for optimal fit and function.
The consultation establishes your treatment plan – how many implants you need, which attachment system makes sense for your situation, whether you need any preliminary procedures like pre-implant tooth extractions or bone grafting, and the complete timeline and cost breakdown.
Phase 2 – Implant Placement Surgery
Implant surgery happens under local anesthesia, though sedation options are available if you prefer. The surgeon creates small openings in your gum tissue, prepares precise spaces in the bone, then places the titanium implant posts. For two to four implants, the procedure typically takes 60 to 90 minutes.
Most patients report moderate discomfort for two to three days after surgery – manageable with over-the-counter pain medication. Swelling peaks around day two, then gradually improves. You’ll stick with soft foods for about a week while the surgical sites heal. Your existing dentures usually get relined to fit over the healing implants, so you’re never without teeth.
Phase 3 – Healing and Integration
The implants need three to six months to integrate with your jaw bone before they can support the snap-in attachments and denture. During this healing period, the titanium posts bond with surrounding bone tissue at a microscopic level through osseointegration – the biological process that makes dental implants uniquely durable among tooth replacement options. You can’t rush this biological process.
You continue wearing your existing denture during healing – either your original denture with modifications or a temporary healing denture. Most patients function normally during this phase, though you need to be somewhat careful with hard or very chewy foods.
Phase 4 – Attachment and Denture Delivery
After integration completes, you return for attachment placement. The dentist exposes the implants if they were buried under tissue, then attaches the ball abutments, locator posts, or bar components depending on your chosen system. This appointment takes about an hour typically.
If you’re using your existing dentures, the dentist modifies them to accept the attachment housings. This involves creating space in the denture base, placing the metal housings precisely aligned with the implant positions, and securing them permanently. If you’re getting new dentures, they’re fabricated with housings already positioned correctly.
The dentist teaches you how to insert and remove your implant-supported dentures properly. The technique feels awkward initially but becomes second nature within a few days. You leave that appointment with your denture snapped onto the implants – finally experiencing the stability improvement you’ve been waiting for.
Complete Timeline Expectations
- Consultation to surgery – 1 to 2 weeks typically
- Surgery to healing completion – 3 to 6 months for integration
- Attachment placement to final denture – 1 to 2 weeks
- Total timeline – 4 to 7 months from start to finish
Some practices offer immediate loading protocols where you receive temporary attachments and modified dentures the same day as implant surgery. This provides some stability improvement immediately but still requires the months-long integration period before final attachments get placed.
Daily Maintenance and Care Requirements for Snap-In Dentures
Snap-in dentures require consistent maintenance to function properly, protect the implants underneath, and last their expected lifespan. The care routine differs somewhat from traditional dentures, with additional attention needed for the implant components.
Your Daily Care Routine
Morning routine starts with removing your implant-supported dentures. Grip the denture firmly and apply steady upward pressure to release the snap attachments. This takes more force than you might expect initially – the attachments are designed to hold tight. Once you learn the proper technique, removal becomes quick and easy.
Rinse your mouth thoroughly with water or mouthwash. Gently brush your gums, tongue, and palate with a soft-bristle brush. This stimulates tissue circulation, removes bacteria, and keeps your mouth healthy. Pay attention to the tissue around the implant attachments – use gentle circular motions to clean these areas without irritating the tissue.
Daily Care Routine Checklist
Track your morning and evening routine — tap each step to mark it complete
Clean the attachments themselves carefully. For ball attachments, wipe around the ball abutments with a soft cloth or cotton swab. For locator attachments, clean around the abutment posts. If you have a bar system, use interdental brushes or special cleaning tools to reach under and around the bar. Food particles and plaque accumulate here easily, so thorough daily cleaning prevents problems.
Clean your denture like you would traditional dentures but with extra attention to the attachment housings. Use a denture brush with non-abrasive denture cleaner – regular toothpaste is too harsh and can damage the denture material. Clean thoroughly around and inside the metal housings where the O-rings or nylon inserts sit. Debris in these housings affects retention and can damage the attachment components.
Evening routine mirrors the morning process. Remove the denture, clean your mouth and attachments, clean the denture thoroughly. Many patients soak their implant-supported dentures overnight in denture cleaning solution, though this isn’t always necessary if you clean them well. Never use hot water – it can warp the denture base.
Before reinserting the denture, inspect the attachment components. Look for visible wear on O-rings or nylon inserts, check that housings are secure in the denture base, and confirm no cracks or damage exist. Insert the denture by aligning it carefully with the attachments and pressing firmly until you hear and feel the snap. The denture should seat completely against your tissue with no gaps or tilting.
What Can Go Wrong and How to Fix It
The most common issue is decreased retention – the denture doesn’t snap in as tightly as it used to. This usually means the O-rings or nylon inserts have worn out and need replacement. This is normal wear, not a failure. Schedule an appointment for new inserts, which takes 15 to 30 minutes typically and restores the tight snap immediately.
Occasionally, an attachment housing loosens in the denture base. You’ll notice the metal housing moves when you press on it, or the denture rocks slightly even when snapped onto the implants. This requires professional repair – the dentist removes the loose housing, cleans the area, and secures a new housing in place properly. Don’t try to fix this yourself with adhesive.
Tissue irritation around implants can develop if cleaning is inadequate. You might notice redness, swelling, or discomfort around the attachment sites. Improve your cleaning routine immediately and schedule an exam. The dentist can professionally clean around the implants and assess whether any infection exists. Caught early, tissue problems resolve quickly with better hygiene.
Rarely, an implant attachment component breaks or becomes damaged. A ball abutment might crack, or a locator post might get damaged. This requires replacement of the damaged component – usually a straightforward procedure completed during a single appointment. The implant itself is rarely affected when an attachment component fails.
Professional Maintenance Schedule
You’ll visit your dentist every six months for check-ups and cleanings. These appointments include professional cleaning around the implants using specialized instruments, examination of tissue health, assessment of attachment component wear, evaluation of denture condition, and X-rays periodically to check bone levels around implants.
The hygienist cleans your implant-supported dentures more thoroughly than you can at home, removing any accumulated plaque or calculus from the denture and attachment housings. They also clean around the implant attachments professionally, reaching areas difficult to clean with home care alone.
Expect to replace O-rings or nylon inserts every 12 to 24 months depending on use intensity. Some patients need replacements annually, others go two years between replacements. The dentist evaluates retention at each check-up and recommends replacement when retention decreases noticeably. This preventive replacement prevents problems from developing.
The denture itself typically lasts five to eight years before needing replacement. Your jaw bone and tissue continue changing slowly over time, even with implants present. Eventually, the denture fit changes enough that a new denture provides better function and comfort. The implants and attachments remain in place – you’re just replacing the denture portion.
Snap-In Dentures Cost: What to Expect by Treatment Type
Understanding the complete cost picture helps you evaluate whether snap-in dentures deliver sufficient value for your investment. Below is a breakdown of initial costs, ongoing maintenance expenses, and long-term financial considerations – including how snap on dentures cost compares to traditional dentures over time.
Initial Treatment Investment
Before we get into the line-item breakdown, here is a side-by-side comparison of the four most common paths patients are choosing between when they come in for a consultation. The cost ranges below reflect complete treatment – surgery, healing components, attachment hardware, and denture fabrication or modification. They do not include bone grafting or extractions, which imaging at your consultation will clarify.
| Treatment Path | Implants | Arch | Estimated Cost | Removable? |
|---|---|---|---|---|
| 2-Implant Snap-In Denture | 2 | Lower arch | $6,000 – $10,000 | Yes |
| 4-Implant Snap-In Denture | 4 | Upper or lower arch | $10,000 – $20,000 | Yes |
| Traditional Dentures | 0 | Upper or lower arch | $1,500 – $4,000 | Yes |
| All-on-4 Fixed Implants | 4 | Upper or lower arch | $20,000 – $35,000+ | No |
Lower arch implant-supported dentures with two implants typically cost $6,000 to $12,000 for complete treatment. This includes implant surgery, healing components, final attachments, and either modification of existing dentures or fabrication of new dentures. The range depends on geographic location, attachment system chosen, and whether you need new dentures.
Upper arch implant-supported dentures with four implants typically cost $12,000 to $20,000 for complete treatment. The higher cost reflects the additional implants required for adequate stability on the upper jaw. Actual cost varies based on location, system design, and denture needs.
Here’s a typical cost breakdown for a lower arch with two implants and ball attachments:
- Two dental implants placement – $3,000 to $5,000 ($1,500-$2,500 each)
- Ball abutments and housings – $800 to $1,200 for components
- Denture modification or new denture – $1,500 to $3,500
- Professional fees and follow-up – $700 to $1,300
- Total estimated cost – $6,000 to $11,000
Additional costs might arise if you need bone grafting before implant placement ($300-$1,200 per site), if extractions are necessary ($150-$300 per tooth), or if you choose premium denture materials ($500-$1,500 additional). Get a complete written estimate that includes all anticipated costs before starting treatment. At Optima Dental in Austin and Round Rock, we provide fully transparent cost breakdowns during your consultation – no surprises, no hidden fees. We also offer dental implant financing in Austin to help manage the investment.
Ongoing Maintenance Costs
O-ring or insert replacement every 12 to 24 months costs $100 to $300 per appointment typically. This includes the replacement components and the professional service to install them properly. Some practices bundle this into maintenance plans, others charge per visit.
Regular check-ups and cleanings every six months cost $100 to $200 per visit, similar to normal dental maintenance. These appointments monitor implant health, check attachment wear, and verify everything functions properly. Insurance may cover these visits as routine dental care.
Eventually, you’ll need denture replacement when the original denture wears out or no longer fits properly due to tissue changes. New denture fabrication costs $1,500 to $3,500 typically. The implants and attachments remain in place – you’re just getting a new denture base with fresh housings. This typically happens every five to eight years.
Over 10 years, realistic maintenance costs include:
- O-ring/insert replacements – 6 to 8 replacements at $200 average = $1,200 to $1,600
- Regular cleanings – 20 appointments at $150 average = $3,000
- One denture replacement at year 7 – $2,500
- Total 10-year maintenance – approximately $6,700 to $7,100
Snap-In Dentures vs. Traditional Dentures Cost Comparison
Traditional dentures cost $1,500 to $4,000 initially for a quality set. That’s significantly less than implant-supported dentures upfront. But the 10-year picture looks very different.
Traditional dentures over 10 years:
- Initial dentures – $3,000
- Denture adhesive – $30/month x 120 months = $3,600
- Relines every 2-3 years – 4 relines at $350 = $1,400
- One replacement at year 7 – $3,000
- Regular dental exams – $2,000
- Total 10-year cost – approximately $13,000
Implant-supported dentures over 10 years:
- Initial treatment – $8,500 (lower arch, mid-range estimate)
- Maintenance costs – $6,700
- Total 10-year cost – approximately $15,200
When comparing traditional dentures to snap-in dentures, the long-term cost difference is often smaller than patients expect once maintenance and replacement are factored in. You’re paying roughly $2,200 more over 10 years for significantly improved stability and function. For many patients, that additional investment is worthwhile for the daily confidence and comfort improvement.
Cumulative Cost Over 10 Years — Visual Comparison
Lower arch estimates. Bars animate as you scroll into view.
Does Insurance Cover Snap-In Dentures?
This question comes up in almost every consultation, and the answer follows a split that catches most patients off guard. The denture itself – the prosthetic portion you remove for cleaning – often receives partial coverage under dental plans. The implants that make the whole system work are usually excluded. Understanding that distinction before you call your insurance company saves a lot of confusion.
Here is how the main coverage types typically treat snap-in overdentures:
- PPO dental plans – Most classify snap-in dentures as a major restorative service and cover roughly 50% of the denture cost after your deductible, subject to your annual maximum. The implant surgery is typically excluded or covered at a very low percentage.
- Original Medicare (Part A and B) – Does not cover dental implants or implant-supported dentures. This surprises a lot of patients who assumed Medicare covered anything implant-related.
- Medicare Advantage (Part C) – Some plans include dental benefits that apply to a portion of denture costs. Coverage varies significantly between plans. When you call, ask specifically about “implant-supported overdentures” – not just “dentures” – because the classification affects the answer.
- Medicaid (Texas) – Does not cover implants for adults. Some denture coverage exists under specific plan structures, but implant-retained solutions are generally excluded.
- HSA and FSA accounts – Both can be applied to the full cost of treatment, including implant surgery. For patients who have these accounts, this is often the most straightforward way to offset a portion of the investment with pre-tax dollars.
What to Ask Your Insurance Provider
Vague questions tend to produce vague answers when you call your plan. These specific questions will get you the information you actually need:
- “Does my plan cover implant-supported overdentures or implant-retained dentures?”
- “Is the implant placement surgery covered separately from the denture prosthetic?”
- “What is my annual maximum for major restorative services, and how much has been used this year?”
- “Does this procedure require pre-authorization?”
Bring the answers to your consultation. A clear picture of what your plan covers – and what it does not – lets us build a treatment plan and payment structure around your actual situation rather than working from assumptions.
Snap-In Dentures vs. All-on-4 Dental Implants
One of the most common questions I hear from patients in Austin and Round Rock is whether snap-on dentures or the All-on-4 fixed implant system is the better choice. The honest answer depends entirely on what you want your end result to feel like. Here’s a side-by-side comparison to help clarify the decision.
← Scroll to compare →
| Factor | Snap-In DenturesImplant-retained overdenture |
All-on-4 ImplantsPermanently fixed arch |
|---|---|---|
| Implants needed | 2-4 | 4-6 |
| Removable? | Yes - removed for cleaning daily | No - permanently fixed in mouth |
| Cost range | $6,000-$20,000 | $20,000-$35,000+ |
| Healing time | 3-6 months | 3-6 months |
| Bone requirement | Moderate bone needed | Can work with less bone (angled implants) |
| Maintenance | O-ring replacement + daily removal for cleaning | Brushing like natural teeth, no removal needed |
| Feel | Very stable - you know it's removable | Feels like natural teeth |
| Best for | Patients wanting stability plus removable convenience | Patients wanting permanently fixed teeth |
Snap-in implant dentures are the right choice if you want a meaningful stability upgrade from traditional dentures without the full cost or commitment of permanently fixed teeth. You gain the security of implants and lose the adhesive – but you still remove the denture for cleaning, which many patients actually prefer.
All-on-4 is the better fit if you want to wake up with teeth that feel like your own – teeth you never think about removing. The higher investment delivers a permanently fixed result. You can also read our comparison of All-on-4 vs. All-on-6 or our complete guide to full-arch dental implants if you want to explore fixed options further.
At Optima Dental, both Dr. Faiza Ali and Dr. Kris Owens perform snap-in overdenture and All-on-4 procedures. During your consultation, we’ll evaluate your bone volume with 3D imaging and give you a clear recommendation based on your anatomy and goals – not on which procedure costs more.
Snap-In Dentures vs. Permanent (Fixed) Dentures
Patients sometimes use the terms “permanent dentures” and “fixed dentures” interchangeably when researching their options. It’s worth clarifying what those terms actually mean – because snap-in dentures and permanent dentures are fundamentally different solutions.
Snap-in dentures – also called implant-retained dentures or overdentures – are removable. They attach to implants with a snap mechanism and you take them out each night for cleaning. They stay put when you eat, talk, and laugh. But they are not permanently fixed in the way natural teeth are.
Permanent or fixed dentures – most commonly achieved through All-on-4 or hybrid denture systems – are screwed directly onto implants by your dentist and do not come out. You clean them in your mouth the way you would natural teeth. Only your dental provider can remove them.
Snap-in implant dentures occupy the middle ground between traditional removable dentures and fully fixed implant solutions. They’re the right choice when you want dramatic stability improvement at roughly half the cost of fixed implants, and when the ability to remove the denture for cleaning is a priority rather than a drawback.
If you’re comparing snap-on dentures vs. permanent dentures and you’re unsure which applies to your situation, the key question is simple: do you want teeth that come out for cleaning, or teeth that stay in permanently? That answer – plus your bone volume and budget – will determine the right path.
Should I Get Snap-In Dentures?
Answer 3 quick questions for a personalized starting point before your consultation
Question 1 of 3
What describes your current denture situation best?
Question 2 of 3
Which daily frustration bothers you the most?
Question 3 of 3
What matters most to you when choosing a solution?
⚠ This is a starting point — not a clinical recommendation. Only a CT scan and in-person evaluation can confirm whether snap-in dentures are right for your bone anatomy and budget.
Who Benefits Most From Snap-In Dentures?
Snap-in dentures work well for many patients, but certain situations particularly benefit from this solution. Understanding whether you fit these profiles helps determine if this investment makes sense for your specific case.
Ideal Candidates
Lower denture wearers frustrated with lack of retention are prime candidates. The lower jaw offers less surface area for suction, and gravity works against lower dentures. Even small amounts of bone loss make traditional lower dentures very unstable. Just two implants can change the lower denture experience dramatically – this is often called the most cost-effective improvement in dentistry.
Patients with adequate bone volume but who want to avoid full-arch implants benefit from the middle-ground solution. Implant-supported dentures provide substantial stability improvement at roughly half the cost of fixed full-arch implants. You maintain the removable convenience while gaining the retention security implants provide.
People who struggle with denture adhesive find implant-retained dentures liberating. No more daily adhesive application, no taste issues, no concerns about adhesive failure during meals. The mechanical snap connection provides reliable retention without chemicals or pastes.
Active individuals who want confidence during physical activities appreciate the security implant-supported dentures provide. Whether you’re exercising, playing sports, or simply living an active lifestyle, knowing your dentures won’t dislodge removes a constant worry.
Seniors and near-retirees planning smile makeovers in the Austin and Round Rock area often find snap-on dentures to be the ideal balance of cost, function, and long-term value. If you want to attend a wedding, reunion, or retirement celebration with a stable, natural smile, this is a realistic path to get there.
Situations Where Other Options Make More Sense
If you have insufficient bone volume, implants may require extensive grafting before placement becomes possible. Grafting adds months to treatment time and thousands to cost. In these cases, traditional dentures or full-arch implants with grafting might be more appropriate solutions. We offer ceramic dental implants as an option for patients with specific material preferences once bone volume is confirmed.
If you strongly prefer fixed teeth that never come out, full-arch implants provide that solution better than snap-in implant dentures. Yes, they cost significantly more, but they deliver the permanently fixed result some patients prioritize above all else. Our full-arch implant candidacy guide walks through exactly who qualifies and what to expect from that path.
If manual dexterity limits your ability to insert and remove dentures independently, snap-in overdentures might create challenges. The snap attachments require firm pressure and proper technique. If arthritis or other conditions affect your hand strength and coordination, discuss this concern with your dentist before proceeding.
If budget is extremely limited right now and you need immediate tooth replacement, traditional dentures provide the most accessible solution initially. You can always upgrade to implant-supported dentures later when finances allow – the implants can be added to your existing dentures in many cases. We offer flexible financing options that help many patients make this transition sooner than they expected. Browse our overview of tooth replacement options to compare costs and timelines side by side.
Patients near Cedar Park can also reach our team at the Cedar Park dental implants location to discuss whether snap-in dentures are the right path forward.
Common Problems With Snap-In Dentures
Every removable prosthetic has a predictable set of maintenance challenges. Knowing what to watch for – and what it actually means when something changes – is part of making a confident decision about this treatment. None of the issues below are unusual, and none of them indicate that the implants have failed.
The Snap Feels Looser Over Time
This is the most common thing patients notice after their first year or two. The O-rings in ball-and-socket systems and the nylon inserts in locator systems wear down with daily use. The snap that felt firm at delivery gradually feels less definitive. This is normal wear on components that are designed to be replaced – not a sign that something has gone wrong with the implants themselves.
O-ring or insert replacement takes about 15 to 30 minutes at a routine appointment and restores the original retention immediately. Most patients need this every 12 to 18 months depending on how much force they use during insertion and removal. Staying ahead of it – replacing components before they wear completely through – prevents the more noticeable problem of a denture that rocks during chewing.
Tissue Irritation Around the Implant Attachments
Redness, tenderness, or swelling around the implant posts almost always points to one thing: food debris and plaque accumulating around the attachment hardware that daily cleaning is not fully removing. The attachment sites require more deliberate cleaning than natural teeth because of the hardware geometry – debris accumulates in the gap between the abutment and the surrounding tissue if brushing stays at the surface level.
Improve the cleaning routine immediately and schedule a professional cleaning. Tissue irritation caught early resolves quickly with better hygiene and a thorough in-office cleaning around the implants. Left unaddressed, it can progress to peri-implantitis – an infection around the implant itself that is significantly harder to treat and can threaten the implant’s long-term stability.
The Attachment Housing Works Loose in the Denture Base
Occasionally the metal housing that holds the O-ring or insert loosens from the denture base. You will notice it rocks slightly when you press on it, or the denture does not seat completely flush against your gums even when you feel the snap engage. This is a professional repair – the dentist removes the loose housing, prepares the denture base properly, and replaces it with correct bonding technique. Attempting to reattach it with over-the-counter adhesive typically makes the professional repair more difficult without correcting the problem.
Insertion and Removal Are Harder Than Expected
Some patients – particularly those managing arthritis or limited hand strength – find the snap mechanism requires more deliberate force than they anticipated. Locator systems are self-aligning and tend to be easier for patients with dexterity limitations. Ball-and-socket systems become easier within the first few weeks as the correct angle and pressure become instinctive.
If this remains a challenge past the adjustment period, ask your dentist about adjusting the retention strength of the inserts. Locator systems use color-coded inserts with different resistance levels – switching to a lower-retention insert reduces the force required for removal without compromising stability during normal use. Most patients are not told this is an option at delivery.
The Upper Denture Rocks Slightly Even When Snapped In
Upper arch snap-in dentures occasionally rock slightly even when fully seated. This usually means the implant count is insufficient for the upper jaw – which has lower bone density and a larger prosthetic surface area than the lower arch. Patients who received only two upper implants sometimes encounter this. A bar-retained system, which connects multiple implants with a custom-fabricated bar and distributes forces across all of them simultaneously, can resolve this without necessarily adding more implants. Four implants with individual ball or locator attachments is the more common solution. This is an evaluation conversation at your follow-up appointment, not an automatic additional procedure.
Making Your Decision About Implant-Supported Dentures
You now understand how snap-in denture systems work, what maintenance they require, and what snap in dentures cost over time. This clarity helps you decide whether snap-in dentures align with your comfort expectations, lifestyle, and long-term goals. The decision comes down to whether the stability improvement justifies the investment for your specific situation and priorities.
Start by honestly assessing your current denture experience. If your traditional dentures work reasonably well – they’re stable, comfortable, and don’t significantly limit your activities – upgrading to implant-supported dentures might not provide enough additional benefit to justify the cost. If your dentures slip constantly, you avoid certain foods, or you’re self-conscious in social situations, the improvement could be life-changing.
Evaluate your bone situation through proper examination and imaging. You need adequate bone volume for successful implant placement. A CT scan reveals your actual bone condition and eliminates guesswork. If you have sufficient bone, implant-retained dentures become feasible. If bone loss is severe, discuss whether grafting makes sense or whether other solutions serve you better.
Consider your maintenance commitment realistically. Implant-supported dentures demand thorough daily cleaning of both the denture and the implant attachments. You’ll need regular professional care and periodic component replacement. Can you maintain this routine consistently? Poor hygiene threatens implant health and reduces the lifespan of attachment components.
Factor in your timeline and patience for the treatment process. From consultation to final result takes four to seven months typically. You need to attend multiple appointments and wait through the integration healing period. If you need immediate improvement, this extended timeline might not work for your situation.
Assess your budget and financing options realistically. What can you actually afford right now? Implant-supported dentures represent significant investment – make sure the financial commitment doesn’t create unsustainable stress. Sometimes starting with quality traditional dentures and upgrading to snap-on dentures later makes more financial sense.
Think about your long-term priorities. Over decades, implant-supported dentures typically cost similar to maintaining traditional dentures when you factor in adhesive, relines, and replacements. The investment pays dividends in daily confidence and function. If you’re planning ahead for 10 to 20 years, the value equation often favors implant-supported dentures.
Here’s a decision framework many patients find helpful:
- Choose implant-supported dentures if – traditional dentures lack adequate retention, you have sufficient bone volume, you want to eliminate adhesive use, daily confidence matters significantly, or you can manage the investment
- Stick with traditional dentures if – current dentures work reasonably well, bone volume is insufficient without grafting, budget is extremely limited, or you prefer the simplest solution possible
- Consider full-arch implants if – you want permanently fixed teeth, you can afford the higher investment, or you prioritize absolute maximum stability
Get a thorough consultation with a dentist experienced in implant-supported dentures. They should evaluate your bone condition with appropriate imaging, explain which attachment system makes sense for your case, provide a complete cost breakdown including maintenance, discuss realistic timeline expectations, and answer all your questions without pressure. If you’d like to hear from patients who have already made this decision, read what our Austin and Round Rock patients say about their snap-in denture experience.
The snap-in denture system works remarkably well for patients who choose it for the right reasons. For many people, snap-on dentures provide the ideal balance between stability, comfort, removability, and long-term value – a substantial improvement over traditional dentures while maintaining removable convenience and costing significantly less than fixed full-arch implants.
If you’re ready to explore whether implant-supported dentures make sense for your situation, Optima Dental Surgery Center provides full consultations throughout the Austin, Round Rock, and Temple areas. We’ll evaluate your bone condition with 3D imaging, explain which snap-in attachment systems work for your case, break down all costs transparently including long-term maintenance, and help you determine whether this solution delivers the improvement you’re seeking. Schedule a consultation to get clarity on your options and make a confident decision about your denture stability.
Ready to Stop Worrying About Your Dentures?
Schedule a consultation at Optima Dental Surgery Center in Austin, Round Rock, or Temple. We'll evaluate your bone condition with 3D imaging, explain which snap-in attachment system works for your case, and break down all costs transparently — no surprises.
Schedule Your Free ConsultationFrequently Asked Questions About Snap-In Dentures
What are snap-in dentures and how do they work?
Snap-in dentures are removable dentures that attach securely to dental implants placed in the jaw. Instead of relying on suction or adhesive, the denture snaps onto implant attachments, providing significantly improved stability while still allowing the denture to be removed for daily cleaning. They're also called implant-supported dentures, implant-retained dentures, or overdentures - all referring to the same type of solution.
How are snap-in dentures different from traditional dentures?
Traditional dentures rest on the gums and often shift or loosen during eating and speaking. Snap-in dentures are anchored to implants, which prevents slipping, clicking, and movement. This added stability improves comfort, chewing ability, and confidence without requiring permanently fixed teeth.
How many implants are needed for snap-in dentures?
Most lower snap-in dentures require two implants for reliable stability, while upper snap-in dentures typically need four implants due to softer bone and greater surface area. The exact number depends on bone quality, jaw anatomy, and the attachment system used.
Are snap-in dentures removable?
Yes. Snap-in dentures are designed to be removed daily for cleaning and maintenance. They stay firmly in place during normal activities but can be detached by applying steady upward pressure. This removable design makes hygiene easier compared to fixed full-arch implant options.
How much do snap-in dentures cost?
Snap in dentures cost typically ranges from $6,000 to $12,000 for a lower arch and $12,000 to $20,000 for an upper arch. Snap on dentures cost depends on the number of implants, attachment system, whether new dentures are needed, and any additional procedures such as bone grafting. Many patients searching "snap on dentures cost" or "snap in dentures cost" are surprised to learn that financing makes these numbers much more manageable. Financing options are available to help make treatment accessible.
How long do snap-in dentures last and what maintenance is required?
With proper care, the implants supporting snap-in dentures can last decades. Research confirms a 10-year implant survival rate of approximately 96.4% for contemporary dental implant systems. The denture itself usually lasts five to eight years before replacement is needed. Attachment components such as O-rings or inserts require replacement every 12 to 24 months, along with regular dental check-ups and professional cleanings.
Are snap-on dentures the same as snap-in dentures?
Yes. Snap-on dentures and snap-in dentures refer to the same thing - removable dentures that attach to dental implants using a snap-fit mechanism. The terms are interchangeable. They're also called implant-supported dentures, implant-retained dentures, or overdentures. The attachment system (ball-and-socket, locator, or bar) may differ, but the concept is the same.
Can you sleep with snap-in dentures?
While snap-in dentures are secure enough to sleep in occasionally, most dentists recommend removing them at night. This gives your gums and jaw bone time to rest, improves blood circulation to the tissue, and allows you to clean the dentures and implant attachments thoroughly. Consistent overnight removal also extends the life of your attachment components.
Do snap-in dentures look natural?
Yes. Modern snap-in dentures are custom-fabricated to match your facial features, gum coloring, and desired tooth shape and shade. Most people cannot tell the difference between snap-in dentures and natural teeth. The aesthetic result depends on the quality of the denture fabrication and the skill of your dental team.
What is the failure rate of snap-in dentures?
Dental implants that support snap-in dentures have a documented 10-year survival rate of approximately 96.4%, according to a systematic review published in the Journal of Dentistry. The denture itself typically lasts 5-8 years before replacement. The most common issue is not failure - it's normal wear on O-rings or locator inserts, which are easily replaced during routine visits. Implant-level complications are uncommon when patients maintain proper hygiene and attend regular professional check-ups.
What are the most common problems with snap-in dentures?
The most common problems are gradual loss of snap retention as O-rings or nylon inserts wear down, tissue irritation around the implant attachment sites from inadequate cleaning, and occasional loosening of the attachment housing in the denture base. All three are correctable at routine dental appointments - none of them indicate implant failure. Retention loss is by far the most frequent, and it is also the simplest to fix: a 15- to 30-minute replacement appointment restores the original snap. The section above on common problems covers each issue and its solution in detail.
Does dental insurance cover snap-in dentures?
Coverage follows a consistent split across most plans: the denture component often receives partial coverage as a major restorative service, while the implant surgery is typically excluded. Original Medicare does not cover implants. Medicare Advantage plans vary - ask specifically about "implant-supported overdentures" when you call, not just "dentures," since the classification affects the coverage answer. HSA and FSA accounts can be used for the full treatment cost including implant surgery. The insurance section above includes the specific questions to ask your provider before your consultation.
Are snap-in dentures covered by insurance?
Coverage varies by plan. Some dental insurance plans cover a portion of the denture component but not the implants themselves. Medicare generally does not cover dental implants. Many patients use dental financing, HSA/FSA accounts, or payment plans to manage the investment. Optima Dental offers implant payment plan options to help make snap-in dentures accessible. We recommend calling your insurance provider directly and asking what portion of implant-supported prosthetics your plan covers before your consultation.